Monday, February 16, 2015

Thinking of You Card, Hand Carved Eraser Stamps and February Tags


First up is my latest addiction! Carving erasers into stamps is really so much fun and instantly gratifying. The hardest part was deciding what design to carve. I'm putting together a small care box for my daughter which will include these stamps and notecards, stamp pads and markers. As you can see, her name is Jennifer, her friends call her Jen.


A friend of my husband's was recently diagnosed with lung cancer, so I decided that sending a card might help his spirits.


Next up, February "Love" themed tag swap. this first one is centered around a funny vintage photo! I love her heart shaped hairdo and the arrow going through it :) I just used some scrapbook paper and stamps, uniball gel pen, some plastic glasses and derwent aqua pencils. I used to knit lots a few years back, so two of the tags have some saved up yarn attached through the holes.


The back is all scrapbook paper, a sweetheart stamp and lacy heart stamp :)


This girl is a stamp on deli paper colored with water color markers. The red background is made with inka gold mixed with water. The heart is another stamp filled in with white crackle paint and a hint of a very watered down red water color paint marker. The butterflies and words are also stamped and colored.
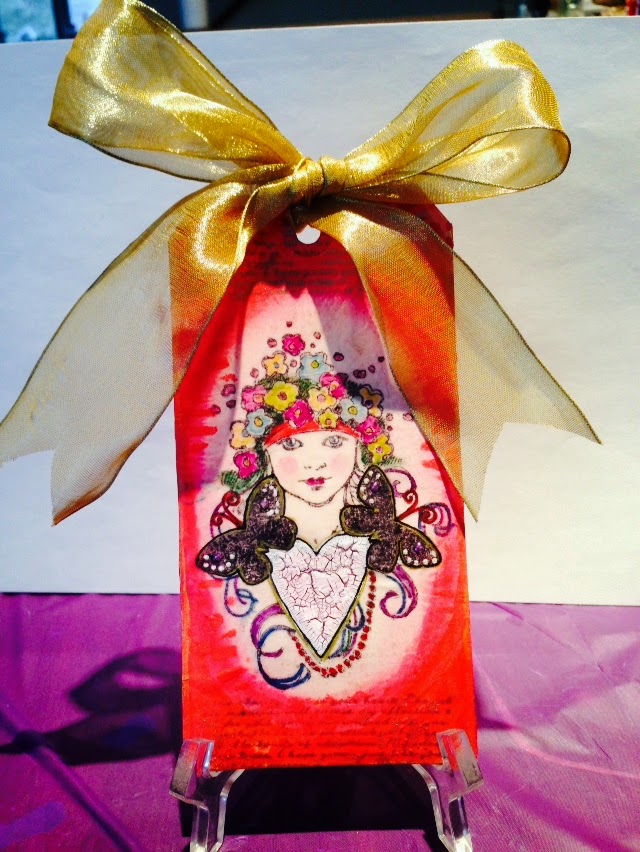

The back is covered with a piece of deli "under paper" that had been used under sprayed cheesecloth.  I used a little bit of highlight around the little boy and added L O V E inside some of the heart with the uniball gel pen. There is an embossed frame using red and gold embossing powder around him and on the bottom two corners. The border around the card is made with the red inka gold as well.


The last tag started with the sun rays embossing folder. I used some texture cream and some sprays and many different color oil pastels to the entire card. I added the lady in love and her beau with a heart frame. 
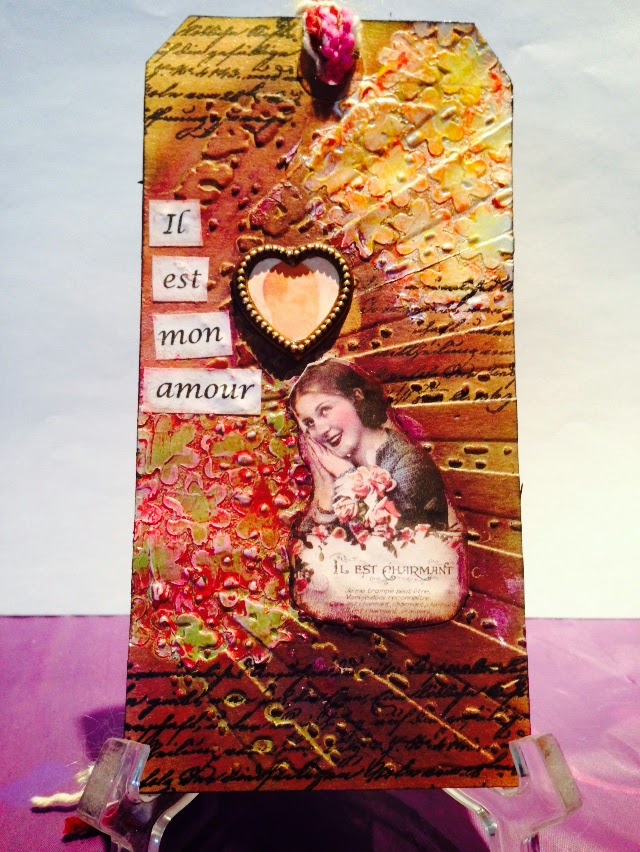

The back of the tag is colored with red inka gold and a paper doily which was sprayed with tattered angels and heidi swapp. I cut the vintage photo in a heart shape and bordered it with some glitter.


A quick card I made out of water color paper, water color pencils, stamps and of course, a white uniball gel pen.


Monday, February 9, 2015

Retirement card and January "Magical" Themed Tags

My husband gave me a project to put together a retirement card for a woman who has worked with him for 25 years. He told me she was going on a six week vacation to Florida to watch the dolphins and soak up some sun. The only request was that I didn't have any words on the card at all...so this is what I came up with. The front of the card has a wave embossed piece of card stock which I sprayed with some dylusion spray and some tattered angels spray. I highlighted some of the waves with a signo uniball gel pen. The umbrella is made from a gelli print with some water color and uniball added for highlights and shadows. The glasses and flip flops are just something I drew and colored in with gel pens and Tim Holtz acrylic dabbers. I also drew the dophin on deli paper and colored it with water color markers. The sand is a piece of card stock which I applied flocking to for the sand effect. The shells are some die cuts that I found in my stash!


The inside of the card is a piece of deli paper sprayed with tattered angles spray and the yellow surrounding it is acrylic paint. I tried to make it seem like it was an underwater experience :)


The back and front of the card.


This tag is very similar to the one I sent off to my daughter, except I made it into a little booklet and wrapped the yarn around it to keep it together.


 Below you can see the front of the tag without the yarn wrap.


 The inside pages were made with deli prints and doodles, vintage paper, water color markers, oil pastels, and musical note washi tape that I made with a musical note stamp. The sun and rays were embossed with the Tim Holtz embossing folder and colored with oil pastels. I used a Posca marker to write the words.


The back of the tag that I colored with Tim Holtz acrylic paint dabbers.


 This "Glenda" tag is sprayed with dylusion spray and the circles are paper that are also sprayed with dylusions and outlined with glitter glue.


The back of the tag has a layer of deli paper sprayed with more dylusion spray and using a circle piece of card stock as a mask and making the crystal ball. I used crackle paint inside the circle. This deli paper was the under paper of the pink circle I used on the front of the tag.
The word, believe, is a stamp.


Close up of the crystal ball :)


 The final tag I put together is a simple one, but I fell in love with the quote and had to use it somehow! The little star fairy is a stamp that I used black ink on. I highlighted the stars with gold glitter, wrote the words on paper and cut and pasted them on the tag.


The back of the card is a piece of black card stock stamped with golden inked stars and glued to the tag.


Coming up next is the February "LOVE" themed tag swap tags. I just sent them out today, so I will post after the delivery :)

Thursday, January 29, 2015

Collage Card and Tag

Just a couple more pieces I sent off to my daughter this morning :)


This was intended to be a card, but I couldn't find a piece of card stock that I liked to have as a background...and I have soooo much card stock to choose from so it was kind of shocking! I wound up writing the letter on a piece of notebook paper and taping it to the back :) The size of this is 6 x 6 and it is a gold card stock piece. I used some of my gelli prints and my new favorite, paper towels which I typically place under any particular piece I happen to be spraying with any spray inks for added protection. I have lots of scraps saved up! Some sprayed burlap, vintage book page and music sheet and of course a tea bag that I stamped are the other bits on this tiny collage. The piece of string with the sequence is leftover yarn that I had from eons ago. I used that along with another yarn to knit my girls headbands...really...eons ago!


This tag is very similar to the one I sent off for the January swap, which I believe she received by now so I feel safe to post this here. While it is similar, it is still very different than what I sent off to my tag swap partner :) This was intended for her, but when I showed it to my daughter, she fell in love with it so I decided to surprise her with it and sent it off to her with the card this morning. Needless to say, I created another for my tag swap partner and will post that here after she posts :)
I used texture cream over a stencil, dylusions spray, stamps, doodles, vintage book pages, homemade washi tape, water color markers, texture spray and gelli prints.


The back of the tag was covered with a gelli print and bits of a vintage music sheet.  The bird is a stamp I used on deli paper colored with water color markers and then sprayed with texture spray.


Friday, January 23, 2015

Filling in Some Wall Space

My daughter recently moved into a loft space apartment and was in desperate need to fill lots of empty wall space. My sister had already created some beautiful and much larger pieces for her, which was great because I don't work well with large pieces of art at all! Working with a smaller space, like a bathroom, is much more suited for me. What I created had some dimension to it, so the shadow box frames were a great match for them!


Thanks for looking :)

Saturday, January 10, 2015

Strength in Numbers

So, I finally finished another spread in my altered book journal. I wanted to experiment with colors that I am not normally drawn to and use some techniques that aren't in my normal arty realm. I had a difficult time after I had my initial background complete. It seemed so busy and everything I thought to put on top of it looked like it was getting lost on top of all that color. After a lot of consideration (and just plain staring at the pages), I decided to add the figures and using the number stencils and the face stencil inside of them. Still needing the figures to pop a little bit more, I added white around them along with some outlining in black. I did try to outline in blue and purple as well, but didn't like how that looked. You can still see that experiment on the figure on the bottom left. Adding some drywall tape and wash tape completed the graffiti style I wanted to achieve in this spread. The phrase, "the gang's all here" popped into focus and then my daughter said that "strength in numbers" was a perfect fit for this spread. Which it really was perfect because of the numbers that were stenciled in the figures. I had to add that somewhere and those words found a home at the bottom of the page. 


Monday, December 22, 2014

December Tags and Christmas Cards

I finally have a little bit of a breather from every day life and thought I would post the December tag exchange tags I made with the theme of "Red" and also the Christmas Cards I made to send to friends and family this year. I made a total of 52 cards which kept me busy! I am looking forward to creating the tags for January very soon!


For the Stocking tag, I used four different red textiles to make up the background, and then used one of the background textiles for the stocking. It is filled with miniature ornaments and more of those mini ornaments are also added to the bottom to give the tag a little bit of movement and interest. The back of the tag is made with a silk fabric with a swatch of cream linen fabric that I stamped the sentiment on, as well as my name and date and added a border with a gold ink blended in the fabric. The trim around the edges is gold ribbon glued to the fabrics. I added bits of different yarns that I had for the tie on top, as well as a few adornments, which you can't see in the picture, tied on the yarn pieces. 


This "Ice Princess" tag starts with textured white gesso with sprinkles of the tiniest specks of glitter, also not visible in the picture. Her hair is made of leaves from a holiday pick to be used in making flower arrangements. I added small dots around the bodice of her dress and also around the  neckline with perfect pearl pen with a tint of blue. The back is covered with a small piece of wallpaper remnant, to which I added the snowflakes and "Red" label made from card stock and glued on. 


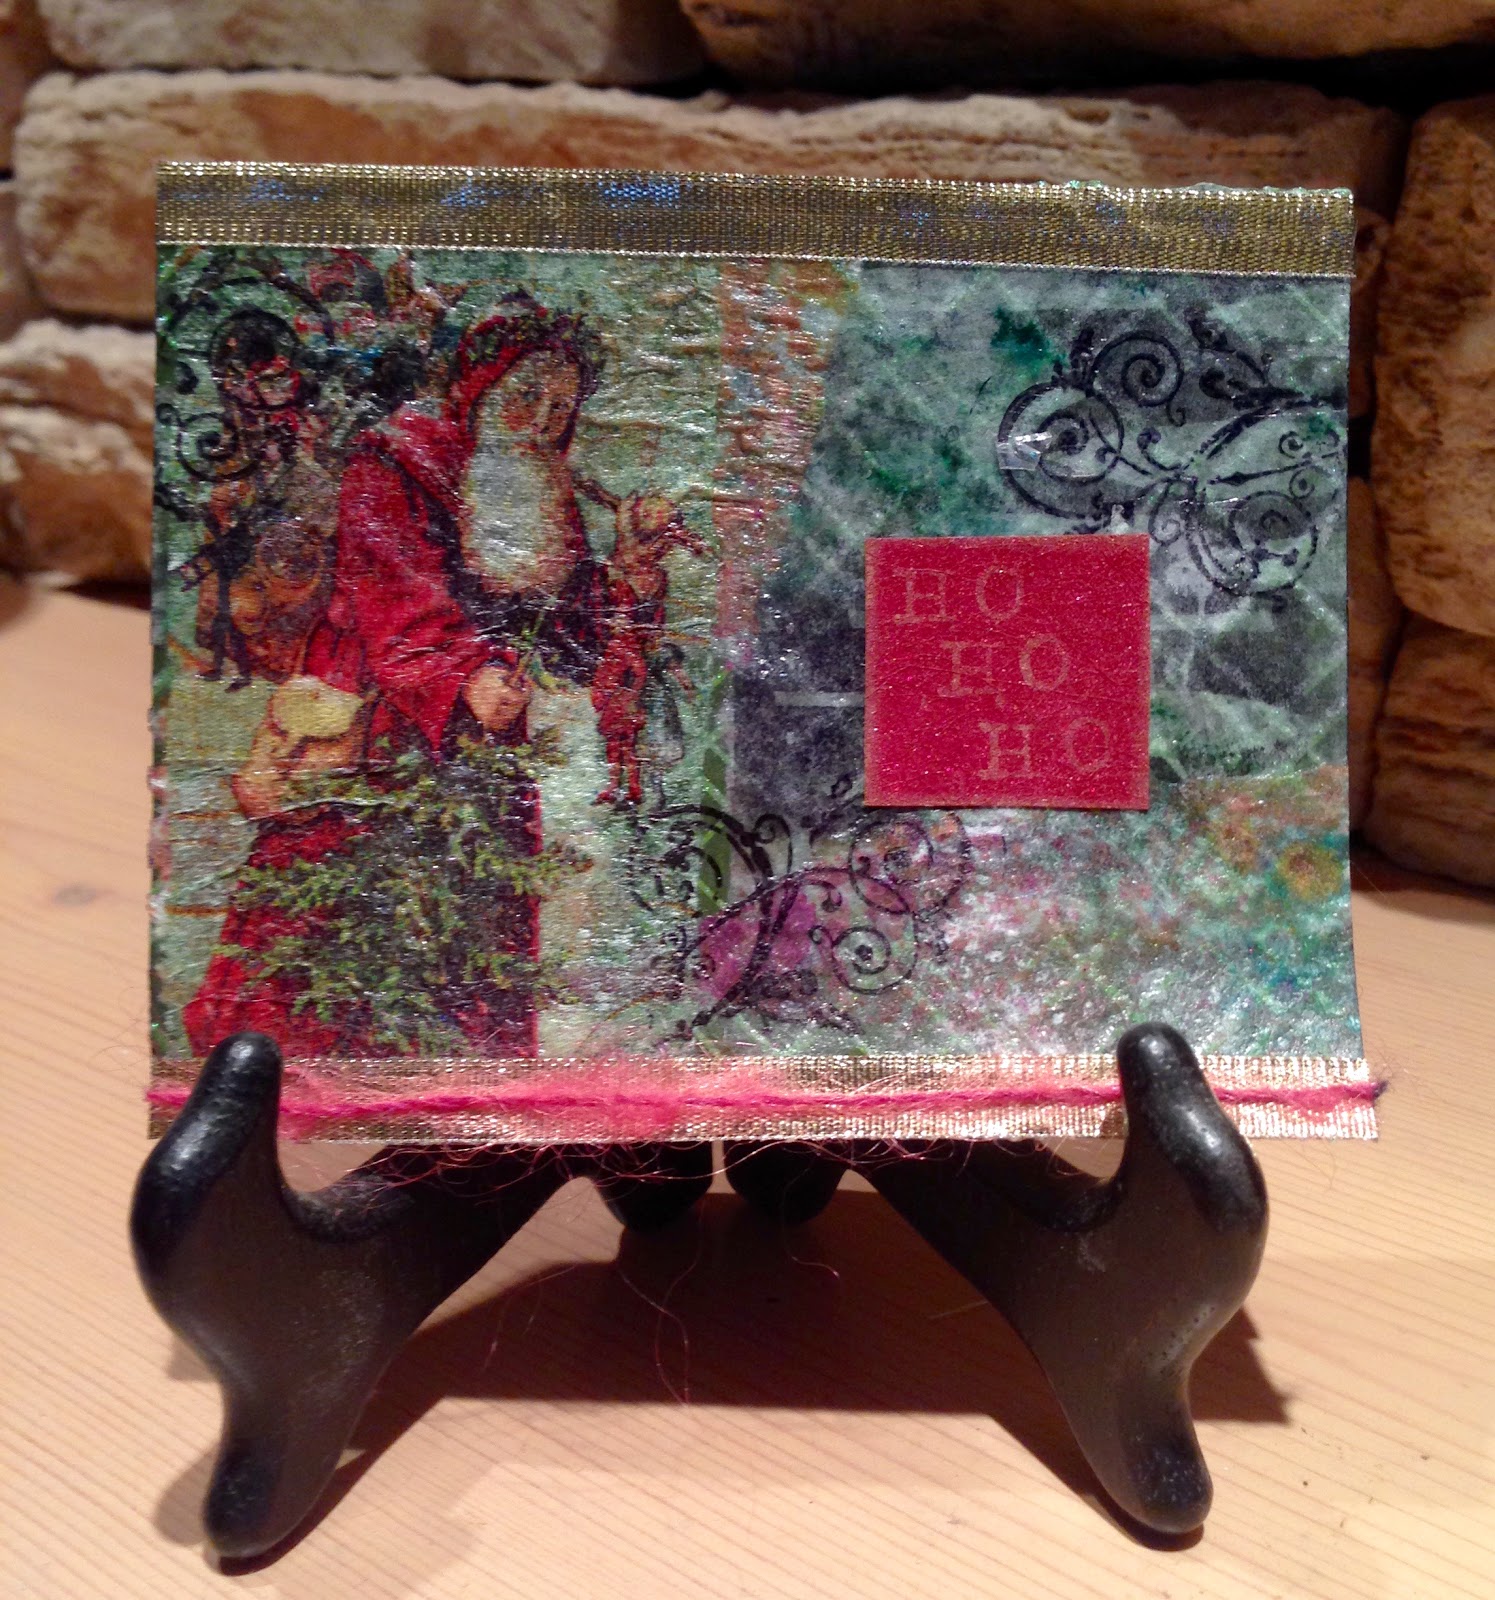
Pictured below is the front and back of the card I made and sent along with the tags. The base is made from a piece of holiday card stock, which I left original for the back of the card. The front is a collage which is made from a napkin (the santa) and different ribbons and tissue paper. I added a few stamps and the Ho Ho Ho sentiment is stamped with gold on a red piece of card stock. The top and bottom border is gold ribbon and a piece of red yarn. I liked how it turned out in person, the photo is not so flattering!


I have snapped just a few of the Christmas cards I sent out to friends and family. The tree is made from a coffee filter sprayed with 3 different Dylusion sprays and topped off with a gold tinted Tattered Angels spray. I folded the coffee filter in the shape of the tree and added ornaments that I cut from my different gelli prints. The garland is made from glitter glue and the tree trunks are made from a National Geographic page treated with citra solve. The gifts under the tree are scraps of Christmas wrapping paper cut to different sizes with a hand drawn bow and ribbon on top and down the front. 


Snowflake stamps and a Winter Wishes stamp adorned the back and front of the envelopes.


I am happy to be starting my January tag exchange tags and will share them when I finish up :) 


Tuesday, December 2, 2014

November Tags and Altered Book Pages

These are my Saturday "creative art day" by products :) I am always inspired by my sister, Sherie, who comes over to my little work space to create with me!

This is a spread in my altered book journal...I am not happy with it, but I am gaining experience through trial and error!


Below, is another spread from the same altered book. Lots of different layers and techniques are used on these pages. It was so much fun experimenting with the different mediums.


Pictured below is another spread from the same book. Here, I used stamps that I made from my very ancient hoard of fun foam, also pictured below! I used the stamps for the ripples in the water, the sea plants on the bottom of the pages, the face and the tail. I am not pleased with this spread either, but I keep telling myself it's all about practicing :)


The first, third and fourth page are experiments with my first batch of home made stamps. I will be painting the faces and not sure where or when I will be using these book pages! Maybe on my journal pages or on a bigger canvas piece.


Finally, I have three tags that I made for a tag swap over on Google + :)


I hope you enjoyed my last two weeks creativity!