My new passion is creating assemblage art dolls from estate sale finds my sister and I go to on Saturdays. We are always on the look out for the left overs and picked over parts of any sale :)
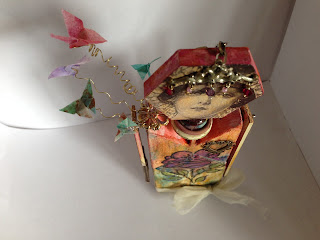
This particular doll started with some vintage wooden toy blocks. What struck me with them, were the way they fit together and their shapes. I used a block from different set to make her head, along with some vintage buttons, vintage folding ruler, vintage ribbon and also a piece of vintage jewelry that I added beads to for her headpiece. I folded origami butterflies from some printed deli paper I made and attached them with wires. Those were attached to a vintage flower shaped button. I used DecoArt paints that my sister let me sample from her own stash and some InkaGold and crackle paint (DecoArt as well) for the body. I used some metal pieces I got from Michael's so long ago, vintage dictionary pages, Tim Holtz stamps, Viva Modeling Cream and even some washi tape. I imagine it would be easier to remember all the supplies I used if I took pics along the way...maybe next time ;) Below are a few different angles to catch a glimpse different mediums I used.
Keeping It Arty
Wednesday, September 16, 2015
Tuesday, September 1, 2015
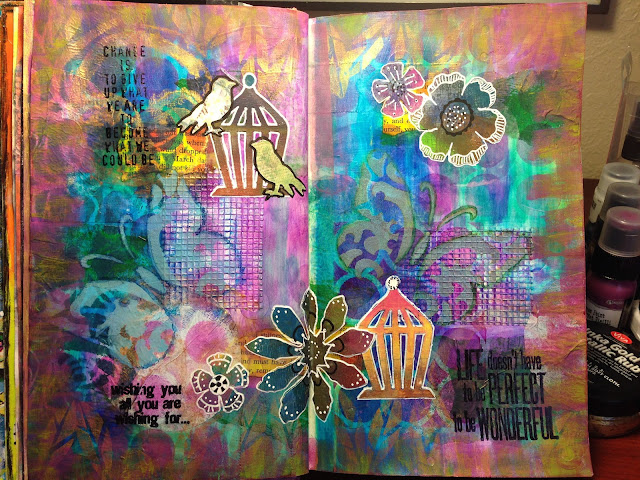
Journal Pages and Assemblage Doll Art
My sister and I also rekindled our love of estate sale shopping! On our many adventures, we collected lots of miscellaneous treasures to create some assemblage dolls. This is the first one that I have completed. I am giving it away as a thank you to one of my husband's co-workers for a very nice random act of kindness. He thought of me while he was at an estate sale and purchased a vintage magazine and gifted it to me :) I am so very thankful!
And of course, a card to go along with the assemblage piece!
Tuesday, July 21, 2015
July Tag Swap
I was fortunate enough to be able to create tags for two people this month of July, my birthday month! The theme for this month is "Royals", a totally fun theme because you can go so many different ways with it.
This first one is "Bow down bitches". I loved the attitude this model is giving and thought it was perfect to adorn her in riches and a crown. I ran the tag through the embosser, painted the tag in red and sprayed it to make it all glossy. Cut out the flowers and butterfly from a great napkin I got from another google friend and colored it with oil pastels once I glued it down. Adding the embellishments to her was so fun and finding that perfect crown for her was a great finishing touch. I had to color the large crown on top with InkaGold and finished it off with some ribbons.

Next, is the "Future Queen" tag, and I was lucky enough to find a vintage picture of Queen Elizabeth as a toddler! She was so adorable with those golden curls! Her crown is made from a vintage book page and some gold wire I wrapped to form the adornment. Her staff is an InkaGold covered toothpick with beads and gold wire to decorate. I used wire and beading for hanging.
"You may address me as Your Royal Highness" tag is one of my favorites. I used inks, sprays and oil pastels for the colors in the background. Using texture paste through a harlequin stencil and added color using oil pastels and ink. Texture spray was also added after all the colors were down. I folded up a gold ribbon to form pleats for the bottom and added the rhinestone for some glamour.


This first one is "Bow down bitches". I loved the attitude this model is giving and thought it was perfect to adorn her in riches and a crown. I ran the tag through the embosser, painted the tag in red and sprayed it to make it all glossy. Cut out the flowers and butterfly from a great napkin I got from another google friend and colored it with oil pastels once I glued it down. Adding the embellishments to her was so fun and finding that perfect crown for her was a great finishing touch. I had to color the large crown on top with InkaGold and finished it off with some ribbons.

"The way a man treats a woman is the best identification of his nobility." This quote by Tsarina Alexandra, the last czar's wife, was the inspiration behind this tag. I used lots of bright colored sprays fort he background, embossed a crown and added the embellishments with black sparkly brads. I used gold glitter glue to frame the pictures.
"You may address me as Your Royal Highness" tag is one of my favorites. I used inks, sprays and oil pastels for the colors in the background. Using texture paste through a harlequin stencil and added color using oil pastels and ink. Texture spray was also added after all the colors were down. I folded up a gold ribbon to form pleats for the bottom and added the rhinestone for some glamour.
The colors behind "My sister may be the princess but I am the Queen" tag are made with the spray inks with a bit of gold splashed on afterwards. Letting the sides soak up some of the red ink is how I made the border. Used lots of glitter glue and colorful ribbons to finish it off.
"Let me adjust my crown and get my day started" had a nice ring to it so I felt I needed just the right Queen pic and a place to put her for it all to work. Her tower is made from a toilet paper roll covered with paper I sprayed with ink through a bit of punchinello shaped like bricks. The top was made from cardboard folded and colored. The Queen has a golden embossed frame around her and also embossed foliage covering the bottom of the tower and to the side. I stamped and colored the bird on deli paper before gluing it to the tag. Some of the flowers I made using vintage book pages with pearls added to the middle. The other flowers are from recollections that I had in my stash.


Tuesday, June 23, 2015
Lots and Lots of Catching Up!
This is the front and back of an extra goodie, an ATC card embossed and painted with the same theme. Front and back.
Pictured below is the tag, front and back. I used sprays, stamps, deli paper, oil pastels, gel pen, beads and an extra bit of card stock to make the book that dangles from the bottom.
The inside pages of the book relay a quote from Malafa Yousafzai, the young lady that is pictured on the front of the tag. The taliban attempted an assassination on her just for attending school. She is now an activist for women's education.
My daughter spent a couple weeks in the hospital in April. She is doing much better now :) During that time she had several visitors who were very thoughtful and brought gifts for her. There were also a couple birthdays that she missed so I got busy making all the thank you and birthday cards while staying with her in the hospital.
At this point, I was really starting to miss the google + community that has kept me inspired to keep creating. I made some time to make some art cards and send them out to some of the ladies...I need to make some more to send out to the rest of them :)
Some stamp carvings for my sister....
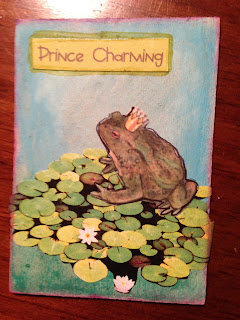
I also attended a Fairy Tale Themed ATC workshop where we made our ATC's and then we were able to trade them with each other. Below are my Frog Prince themed cards.
I couldn't resist making this next piece for one of my daughter's friends. She loves to make art and she is one huge supporter of mine :) It started as an ivory wallpaper sample so it is very flexible. The paint, modeling paste, glue and deli paper stuck to it just fine! I have a few more samples that I can't wait to get started on.
Next up...June tag swap tags!
Subscribe to:
Comments (Atom)


